headerchop.jpg

12.31.2013

My 2013 Recap

Happy New Year’s Eve!  I hope you had a relaxing holiday.  I went home to Canada to see my family & friends and it was fantastic (no surprise).  This was actually my first Christmas where I didn’t stay at my parents.  The boy and I decided to try something new and rented an Airbnb.  In the past, the holidays have been stressful for me, squeezing in visits with all of my friends, family, all of his family and him!  It became more of a task to see everyone and, to me, that was no way to spend the holidays.  I’m happy to report that renting our own place together was the perfect remedy.  We were able to do our visits together and then come home to our place downtown and relax.  

Anyways, enough about my holiday housing.  I thought it would be fun to do a mini recap of my year.  This list is a mixture of highlights, things I'm grateful for, things on my bucket list and personal accomplishments.  With the beginning of a new year I tend to get so focused on my future goals that I forget to take a moment to reflect on what I'm grateful for from the previous year.  So here is my recap of 2013.

1. I went to New Orleans for the first time and had an amazing time soaking up all the culture and music.

2. I got a Creuset for Christmas and I haven’t looked back.  If you are debating whether to invest the money, my answer is DO IT!  It seriously has changed cooking for me.

3. I filmed a pilot for HBO and it got picked up.  This was a MASSIVE dream come true that I’m incredibly grateful for.  How did I celebrate?  I bought a new garbage bin (true story).

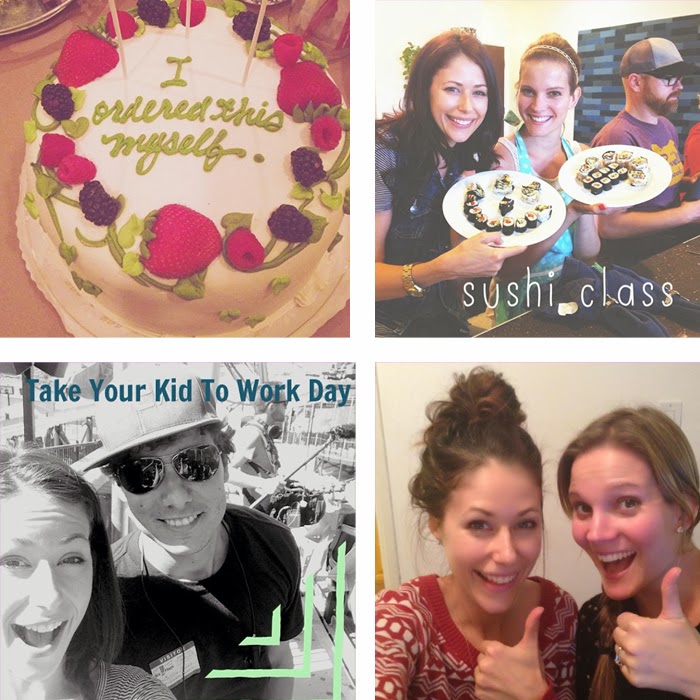
4. I forced decided to get myself organized with my finances and vowed to never let that pile of receipts  pile up ever again.

5. I went on a trip to San Francisco with my friend Mary.  It’s hard to put into words the effect this adventure had on me, but it was one of the most creatively inspiring trips I have ever been on in a completely surprising way.

6. I hosted a floral crown making party and it was the best time ever.  Gal pals + crafts = my favorite thing.

7. I got a sewing machine (thanks Mom & Dad) and learned how to sew my first skirt.

8. Amber & I went on the best spontaneous trip to Santa Barbara and biked from vineyard to vineyard.  This is something that has been on my bucket list for YEARS and I'm so happy we did it in such a last-minute way!

9. I celebrated my birthday with an incredible group of gems that I’m honored to call my friends.  L.A. is not the easiest city to make meaningful friendships in and I’m so lucky to have made so many.

10. Amber surprised me with a vegan sushi making class at Spork Foods for my birthday.  We not only learned how to make sushi but also how certain foods, like white sugar, are actually whitened using BLEACH!

11. A good friend of mine is a producer on one of those “Top Roller Coasters of the World” shows and got me into Six Flags before it opened to test out the new Full Throttle ride.  As a kid, I was OBSESSED with these roller coaster shows, so it’s not an understatement to say that it was a dream come true.

12. Launching Granny Girls this year was one of the biggest highlights of the year.  Amber & I have been working on this blog forever and to see it out in the world is something I’m incredibly proud of!

13. I Went to the HBO Emmy Party which was insanely cool.  It was so neat to be in the same room as some of the winners on such a celebratory night!

14. I started experimenting more with photography with the goal of pushing myself out of my comfort zone.  One of the highlights in that journey was my first photo shoot using only my 35mm film camera.  This was a huge deal for me since I wasn’t feeling very confident with my skills and was THRILLED with the results.

15. I hosted (along with my male roomie) an epic Canadian Thanksgiving potluck dinner.  (Sorry to the friends I had to crop out of the pic so it would fit into the square frame!) 

16. Every Christmas, my high school besties get together for our Ugly Christmas Sweater Party.  My favorite part of the night is where we go around updating everyone on our past year.  I've known this group for over 10 years and they have always supported & loved me.  Even through my weird hot pink and black skulls phase.  Bless them.  

2013 was an incredible year and I'm so excited to see what 2014 has in store for me!


12.23.2013

Happy Holidays!

We just wanted to pop in and let you all know that we are going to be taking the week off to spend time with our families.  We hope you have an amazing holiday with lots of delicious food and quality time with the ones you love!  We are so excited to dive into the New Year with all our Granny Girls. 


P.S. If you have massive separation anxiety, don’t worry, we’ll still be posting pictures on our Instagram.


12.20.2013

Gigi's Chocolate Chip Cookies


I read a lot of blogs and my favorites are the ones that share recipes as well as a glimpse into the writer's life.  I love seeing pictures of peoples' homes and how they decorate and their neighborhoods and local restaurants/coffee shops.  I love hearing about the books people read & dinners they make...  There's something fascinating and inspiring to me about how other people spend their days.  Also, now that I'm pregnant (okay, and way before) I love reading blogs written by young moms and hearing about their pregnancies and adorable babies.  There are a few bloggers that I have been following for some time now and although they have no idea who I am, I laugh to my husband that it feels like we're friends.

There's one blog, written by an awesome gal named Kacie, that I think I first came across when I was googling baby stuff (also probably before I was pregnant - yes, I have had a secret "baby" Pinterest board for at least a year).  It's called "A Collection of Passions" and she shares great recipes, baby tips, gorgeous photos of her family, and my favorite part - the most adorable videos you have ever seen of her cooking & baking with her daughter, Gigi.  Now that we're expecting a daughter of our own (who will probably come out just as fluffy-blonde-haired), my husband and I love watching these videos and imagining baking with our own little pajama-clad muffin on Sunday mornings.

They're all ridiculously cute, but this Chocolate Chip Cookie video is my favorite.  I finally made the cookies and they were so good that I now make them all the time and my husband and I refer to them as "Gigi's Cookies".  I also passed the recipe onto a friend and she told me that her husband said they were the best cookies she had ever made - so thank you, Kacie & Gigi!

So now that you're full of adorable-ness and wishing you were full of chocolate chip cookies, here's the fantastic recipe:


Gigi's Chocolate Chip Cookies

Recipe by Kacie McMackin of 'A Collection of Passions'

Ingredients:


Dry Ingredients

  • 2 1/4 cups flour
  • 1 teaspoon fine salt

  • 1 teaspoon baking soda
  • 
1 tiny pinch of freshly shaved nutmeg, optional
  • 
2 cups semi-sweet chocolate chocolate chips

Wet Ingredients

  • 2 large eggs (at room temperature)

  • 1 cup (2 sticks) butter, softened to room temperature
  • 3/4 cup granulated sugar
  • 
3/4 cup firmly packed light brown sugar

  • 2 teaspoons pure vanilla extract


Directions:


1.  Preheat your oven to 350 degrees.

2.  Mix flour, salt & baking soda together in a bowl.

3.  In a separate bowl, cream together your butter & sugar (if you don't have a mixer you can do this by hand).  Then add the vanilla.

4.  In a separate small bowl, whisk your eggs and then add them to your butter & sugar mixture.  Mix well.

5.  Now, slowly sprinkle in your flour and mix until it's just incorporated (Don't over mix!  We want to keep these cookies nice & fluffy).  Stir in the chocolate chips.

6.  Scoop up spoonfuls of dough and roll them into balls (a little smaller than a golf ball).  Place on baking sheet about 2-3 inches apart.  (If you have room, keep your dough in the fridge between batches so it stays cold.  This will help to keep your cookies from flattening).

7.  Bake for 9-11 minutes, until the edges of your cookies start to turn a nice golden brown and they're light brown in the middle (I find mine usually take about 11-12 minutes, probably because I make them a little larger). 

Great tip:  This batch makes around 30 cookies so I took a tip from Kacie and placed a sheet of the uncooked dough-balls in the freezer.  Once they're frozen you can toss them in a ziploc bag and save them to have on hand for fresh-baked cookies whenever you want!  (Note: If you're baking them from frozen, increase the baking time to 12-15 minutes).


Have a great weekend!


12.18.2013

Easy DIY Holiday Gift Wrap

Can you believe it’s only a week until Christmas?!?  Every year I tell myself that I’m going to be more organized than the year before.  I fantasize about having all my presents purchased by the first week of December and beautifully wrapped under the tree.  It comes as no surprise that I still haven’t finished my Christmas shopping and therefore there are not any festively wrapped presents stacked together.  However, one task I have completed is crafting up some pretty packaging ideas.  

I had two goals in mind when thinking up my wrapping inspiration: Easy & Inexpensive!  I think I accomplished both.  My first tip is brown shipping paper!  There are so many different ways you can dress up this paper.  And the best part is you can get a HUGE roll of this stuff at Staples for $3.49.  


My first gift wrap inspiration is a polka dot print.  This one is super easy to execute.  All you do is use the end of a pencil eraser and a white stamp pad.


I cut my paper to size first, then stamped it out.  Wrap it up with a cute doily ribbon and you have an adorably packaged gift.  


Another idea is to use some winter-inspired foliage (a fancy word for leaves and plants) from outside.  Living in balmy California, I was certain that I was going to have to buy some sort of fake, decorative berry bundle from the craft store, but was shocked to find a bountiful berry bush on my morning jog.  You can use pine tree branches, pine cones or acorns.  Wrap some twine around the gift a few times to secure it.  


I also tried slipping a black and white photo underneath to add some dimension.  You could even use a photo of the person who is receiving the gift!

Something as simple as a glitter feather can dress up a gift.  These were super easy to make, I just painted some Mod Podge Glue on the end of a feather and dumped a healthy pile of glitter on it.  


 Add a paper doily, some crochet ribbon and secure with some twine.

I loved how this one turned out!  Looks like I wrapped it with a knitted piece of fabric, right?  It’s actually a photocopy of one of my sweaters!  I was so impressed with the results on this one.  I used my scanner at home but you can always go to your local copy shop and use their photo copy machine.  You may get some weird looks, but I think it’s worth it.  Secure with ribbon and a button or you can make a yarn pom pom.  


Making your own pom pom is super easy.  Just wrap the yarn around your fingers about 40 times.  Spread your fingers apart to keep the space between the yarn open.  Take an extra piece of yarn (about 5 inches long) and tie it around the space you created with your fingers.  (This is hard to explain, but hopefully you can see what I mean in the pictures). 


Double knot it.  You’ll be left with a figure eight shape.  Now cut both the top and bottom of your “8.”  Fluff out your ball and trim.  


By now you know that Amber and I love to use shipping tags on our gifts.  They look great and you can easily customize them for any occasion.  Best part is how cheap they are!  You can get a pack of 100  tags from Staples for $5.99.  Add some cute stamps and you're done!

I may not have finished my Christmas shopping yet, but I do have a pile of beautifully wrapped, empty boxes!  Winning.


If you create some fun gift wrap, share it with us on Instagram or Twitter!


12.16.2013

Whole Wheat Banana Walnut Pancakes


Some of my favorite things about the holidays are long sleep-ins, lazy mornings and big, cozy breakfasts.  Every Christmas morning, my sister makes the most amazing Belgian waffles while the rest of us prepare eggs, bacon, fresh fruit, and my mum keeps all of the mugs full of rich, hot coffee (with Baileys).  I've been dreaming about this breakfast but with only a week and a half until Christmas I knew I could hold out a little longer and so I decided to make pancakes instead.  These amazing pancakes are made with whole wheat flour (you can substitute all-purpose flour if you want), bananas, toasted walnuts and just a teensy bit of sugar.  They get their sweetness from the fruit and taste like banana nut muffins in pancake form.  The original recipe makes a TON and since this weekend it was just my husband and me, I cut the recipe in half.  I've included both versions for you below so you don't have to do the conversions in your head while waiting for your first cup of coffee to kick in.  Serve these with real maple syrup & the toppings of your choice.  Happy Holidays!


Ingredients


Half Recipe.  Serves 2-3 people:
  • 1 ripe banana, mashed
  • 3/4 cup of milk
  • 1/4 cup sour cream
  • 1 egg
  • 2 tablespoons butter, melted
  • 1/4 teaspoon vanilla extract
  • 1 cup white whole wheat flour
  • 2 tablespoons sugar
  • 1 teaspoon baking powder
  • 1/2 teaspoon baking soda
  • 1/8 teaspoon salt
  • 1/8 teaspoon cinnamon
  • 2 tablespoons chopped, toasted walnuts

Full Recipe.  Serves 4-6 people:
  • 2 ripe bananas, mashed
  • 1 1/2 cups of milk
  • 1/2 cup sour cream
  • 2 eggs
  • 4 tablespoons butter, melted
  • 1/2 teaspoon vanilla extract
  • 2 cups white whole wheat flour
  • 1/4 cup sugar
  • 2 teaspoons baking powder
  • 1 teaspoon baking soda
  • 1/4 teaspoon salt
  • 1/4 teaspoon cinnamon
  • 1/4 cup chopped, toasted walnuts


Directions


1.  Mash bananas with a fork.  Then add milk, sour cream, eggs, melted butter & vanilla.  Whisk until well mixed.

2.  In a separate bowl, combine your flour, sugar, baking powder, baking soda, salt & cinnamon.  Stir together.

3.  Add dry ingredients to wet ingredients & stir until batter is smooth.  Then fold in chopped, toasted walnuts (I chopped mine & then toasted them on a tray in my toaster oven for about 2 minutes.  Just watch carefully to make sure they don't burn, like my first batch did).

4.  Using a nonstick frying pan (I sprayed mine with a little coconut oil) over medium heat, pour in your batter (I used about 1/4 cup for each pancake).  Cook until you start to see little bubbles forming on the surface and the edges start to look done.  Then flip and cook for another minute or so, until golden.

5.  Serve right away with maple syrup & your choice of toppings.  (You can also turn your oven on to about 250 F. and keep your cooked pancakes warm while you finish the batch).  Enjoy!


12.13.2013

Zooey Magazine's Holiday Party at Milk Jar Cookies


This past weekend, we went to Zooey Magazine’s "Cookies, Crafts & Cocktails" party at Milk Jar Cookies.  You may recognize the location from when Amber & I went there a few months back for “blog research” aka to try as many cookies as our stomachs could hold.  As you can imagine, we were excited for a night filled with all our favorite things: Cookies (specifically Milk Jar Cookies), Crafts & Cocktails!


When I first walked into Milk Jar Cookies and saw that the craft activities included Anthropologie-inspired snow globes, I texted Amber immediately with a message that involved an excessive amount of exclamation marks, followed by a healthy dose of holiday emoticons.  


These snow globes have been on our craft-to-do-list for a while now, so naturally we were pumped to be making them.  It's a really simple craft that you can easily do yourself.  All we did was pick out a tree (like these), hot glue them to the inside of the Mason jar lid, add some fake snow and then close it up.  Amber had some minor difficulties when she tried to squeeze two trees onto her lid which then wouldn't fit into the jar.  This resulted in her attempting to rip off her already-glued-on tree, bending her lid in half and cutting her finger open.


A minor #craftfail.  The end result, however, was a success.

That's our friend, Mary, who also happens to be on the cover of Zooey’s Spring issue.  And, yes, I forced her to take this picture:

The other craft of the night was a gorgeous glitter pine cone.  A simple, yet beautiful craft where you spray your pinecone with an adhesive glue and then toss it in a paper bag with some glitter and shake it up!  Amber got really aggressive with her shaking technique which resulted in a perfect glitter pine cone.  

As we all crafted, we enjoyed way too many delicious cookies.   The flavors of the night were Gluten-Free Chocolate Chip, Cinnamon Sugar, and Peppermint Candy Cane.  It’s hard for me to put into words how delicious these cookies are.  Courtney, from Milk Jar Cookies, has seriously mastered the art of a crispy edged cookie with a ridiculously chewy, melt-in-your-mouth center.  If you live in Los Angeles I highly recommend that you stop by IMMEDIATELY and try a few for yourself.  


As the night was coming to a close, Mariah Carey’s Christmas album (the best Christmas album, in my opinion) was blasting and, naturally, a full-blown dance party and lip-synch followed suit. 


It was so great to finally meet Courtney and her husband Adam, who own Milk Jar Cookies, and talk to them about starting their dream business.  You can feel the amount of love and passion that they have put into their shop, from the details of the decor to the deliciousness of their cookies.  Also, their staff (who were leading the Mariah-dance-party) are a group of amazingly positive gems that genuinely love to work there. 

As if the night wasn't already the greatest ever, we were all lucky enough to leave with our own boxes of take-home cookies, the cutest hair ties from Emi Jay and a Mason jar tumbler from the Mason Bar Company!


Thank you Zooey Magazine and Milk Jar Cookies for inviting us to such a fun, festive party.


12.11.2013

Doily & Glitter Candle Holders


It's another Mason jar craft!  That's because we made both these and the "Cookie Mix in a Jar" on the same day and then got too busy to separate them with a recipe post, so instead it's a jar-stravaganza!  (Yeah, that's not even clever. I'm writing this past my bedtime so forgive me).  All hilarity aside, we think these candle holders turned out pretty gorgeous.  We made these because we had seen something similar on Pinterest and we both wanted to decorate our houses with them - thus, a blog post was born.  These are sparkly and wintery and pretty festive but they could also be considered "elegant" and "vintage" and be left out all year.  And speaking of left out - definitely leave out the real candles when using these lovlies because they are filled with paper and things that can catch on fire.  Battery operated tealights only, Granny.    

Supplies


For the Doily Jar:
  • Ball Mason Pint Jars (16 oz. wide mouth) 
  • Mod Podge
  • A medium sized paintbrush
  • Parchment Paper
  • Paper doilies (we used these, which we got at JoAnn's, but you can use any style)
  • Battery operated tealights

For the Glitter Jar:
  • Ball Mason Pint Jars (16 oz. regular mouth)
  • Mod Podge
  • A medium sized paint brush
  • Glitter (for ours we used a snow-like clear glitter)
  • Battery operated tealights

Directions


For the Doily Jar:

1.  Cut out a (rectangular) piece of parchment paper that fits inside your wide-mouth jar.

2.  Collage said piece of paper with cut-up paper doilies.  Stick them on with Mod Podge. (For ours we cut up these giant doilies and glued them on in strips - but you can use any shape/size doilies you want, just cut them to fit the parchment paper).

3.  Paint the inside of your jar with a thin layer of Mod Podge and press your doily-paper in to stick.

4.  Let dry & add battery operated tealight.

For the Glitter Jar: 

1.  Paint the inside of your jar with a thin layer of Mod Podge.

2.  Dump a whole bunch of glitter into the jar, replace the lid and shake.

3.  Once the inside is well coated with glitter, pour out the excess onto a piece of paper and funnel it back into your glitter container.

4.  Let dry & add battery operated tealight.


Also, we have a winner of our November Photo-A-Day Challenge.  Congratulations to Kim Ralls!  We will be contacting you to get your address so we can mail you your prize.